
Step 1 of 6
Install and open the app
Install Rekit from the Shopify App Store.
After install
- Click Install and approve the permissions Shopify asks for.
- In Shopify admin, open Apps → Rekit.
- If the app asks you to choose a plan, pick one on the Billing page.
Step 2 of 6
Create a plan and add products
A plan sets how often customers receive their order and how much they save.
Create a plan
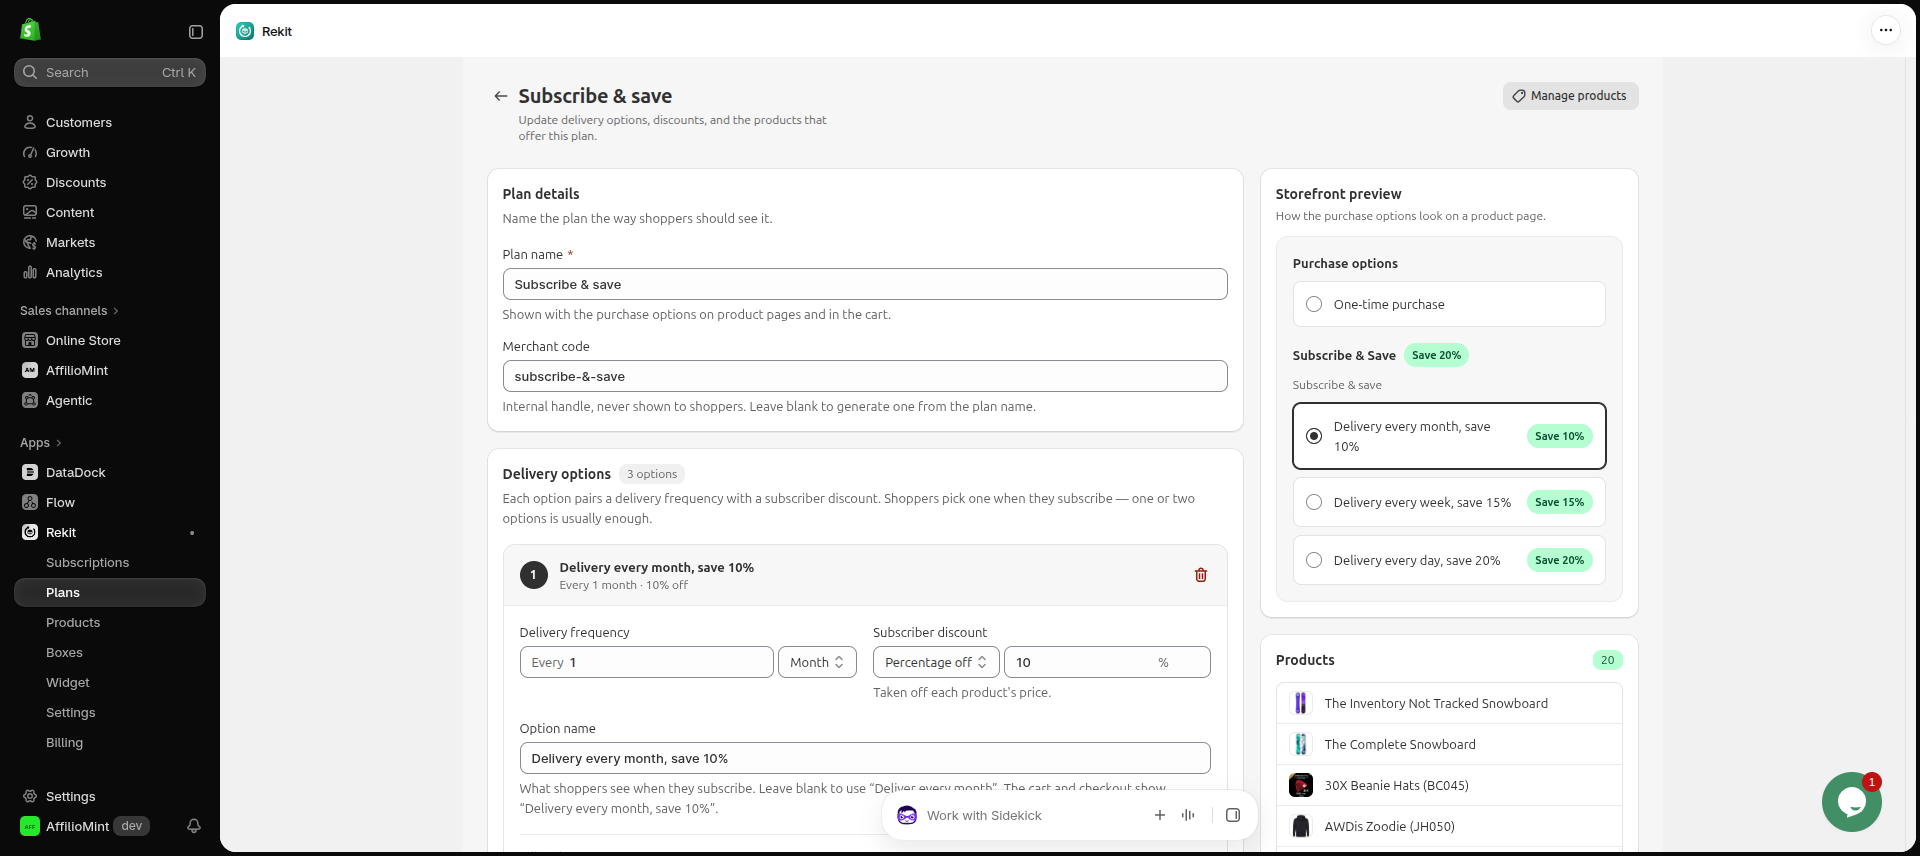
- In Rekit, open Plans and click Create plan.
- Enter a Plan name, choose the Delivery frequency, and set a Subscriber discount if you want one.
- Open the Add from catalog tab and pick the products for this plan.
- Click Save.
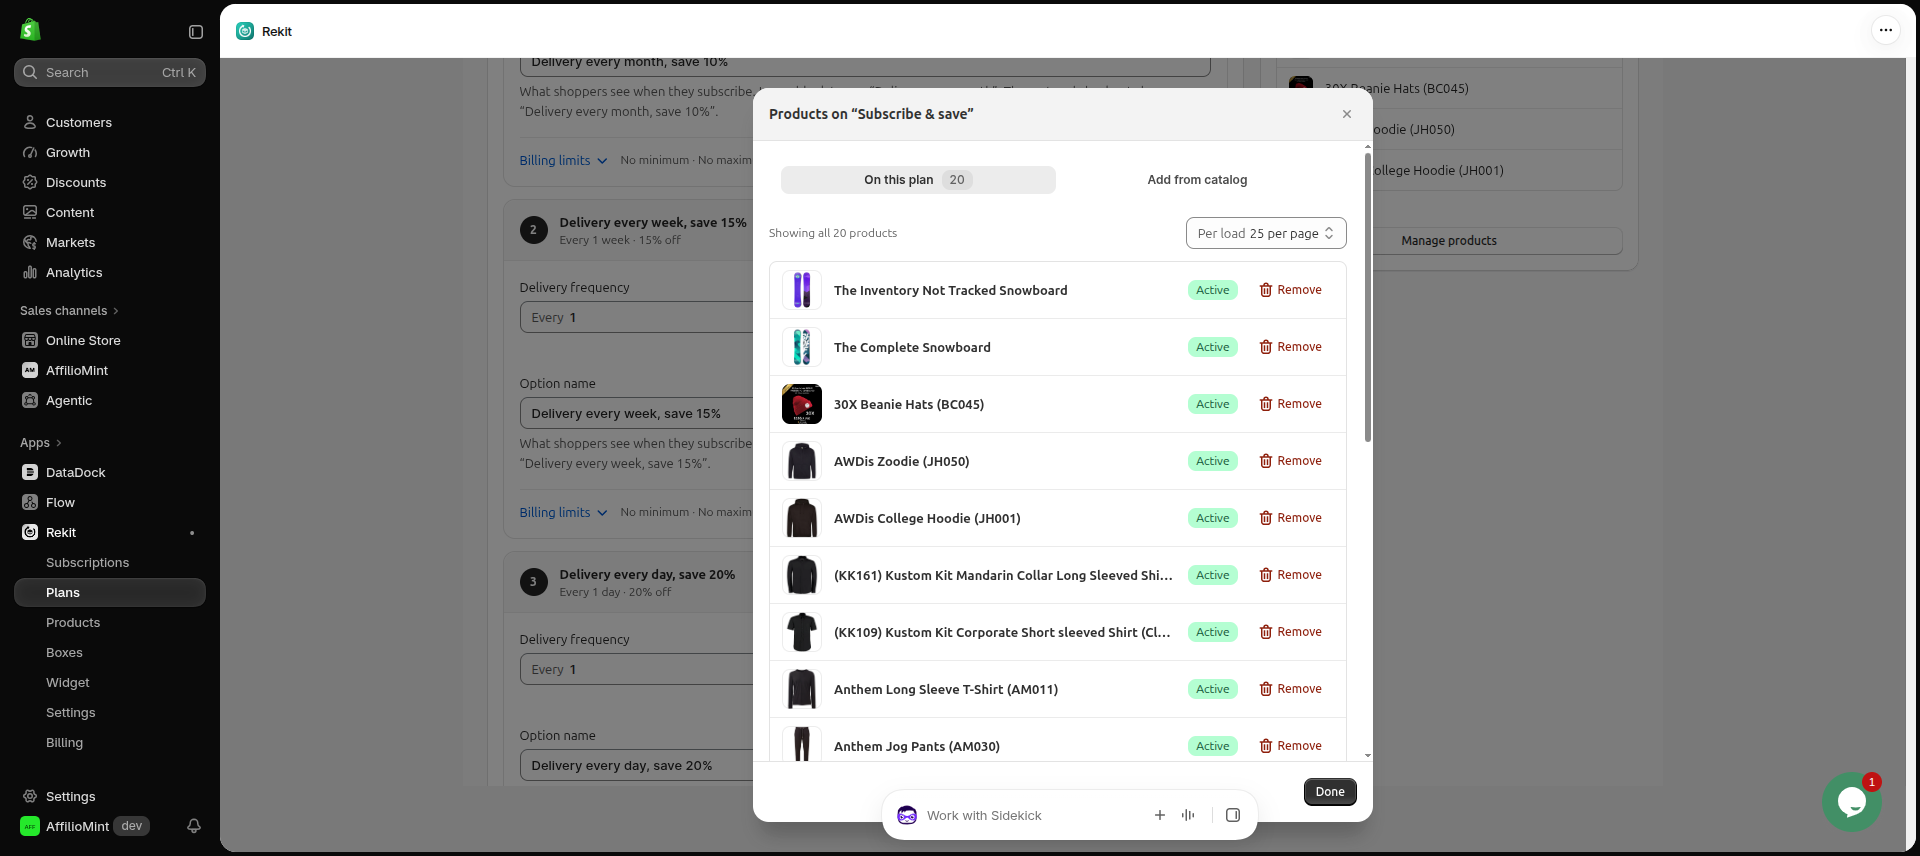
To add a plan to more products later, open Products, select the products and click Assign plan. If some products fail, they already have that plan, so select only the ones that still need it.
Step 3 of 6
Add Rekit to your theme
Rekit adds blocks you place in your theme editor. They are listed under Rekit in the Apps tab.
Show subscription options on product pages
- Go to Online Store → Themes → Customize.
- At the top of the editor, open your product page template, for example Products → Default product.
- In the product information section, click Add block → Apps → Rekit plan picker.
- Drag the block above the Add to cart button, then click Save.
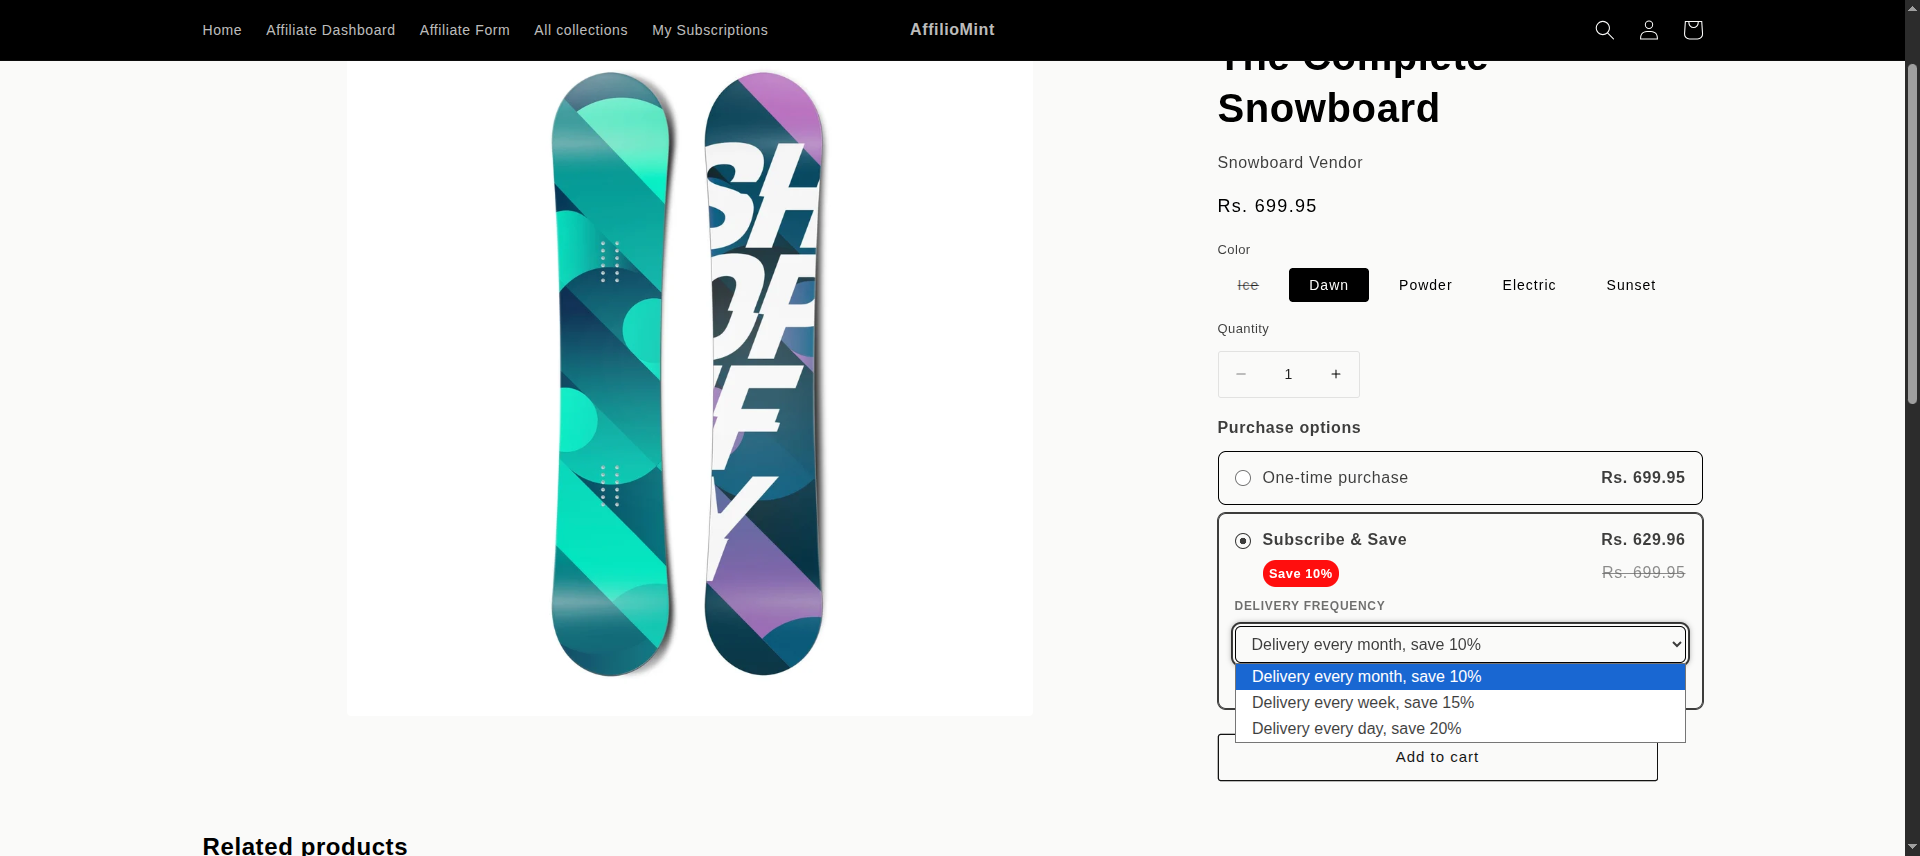
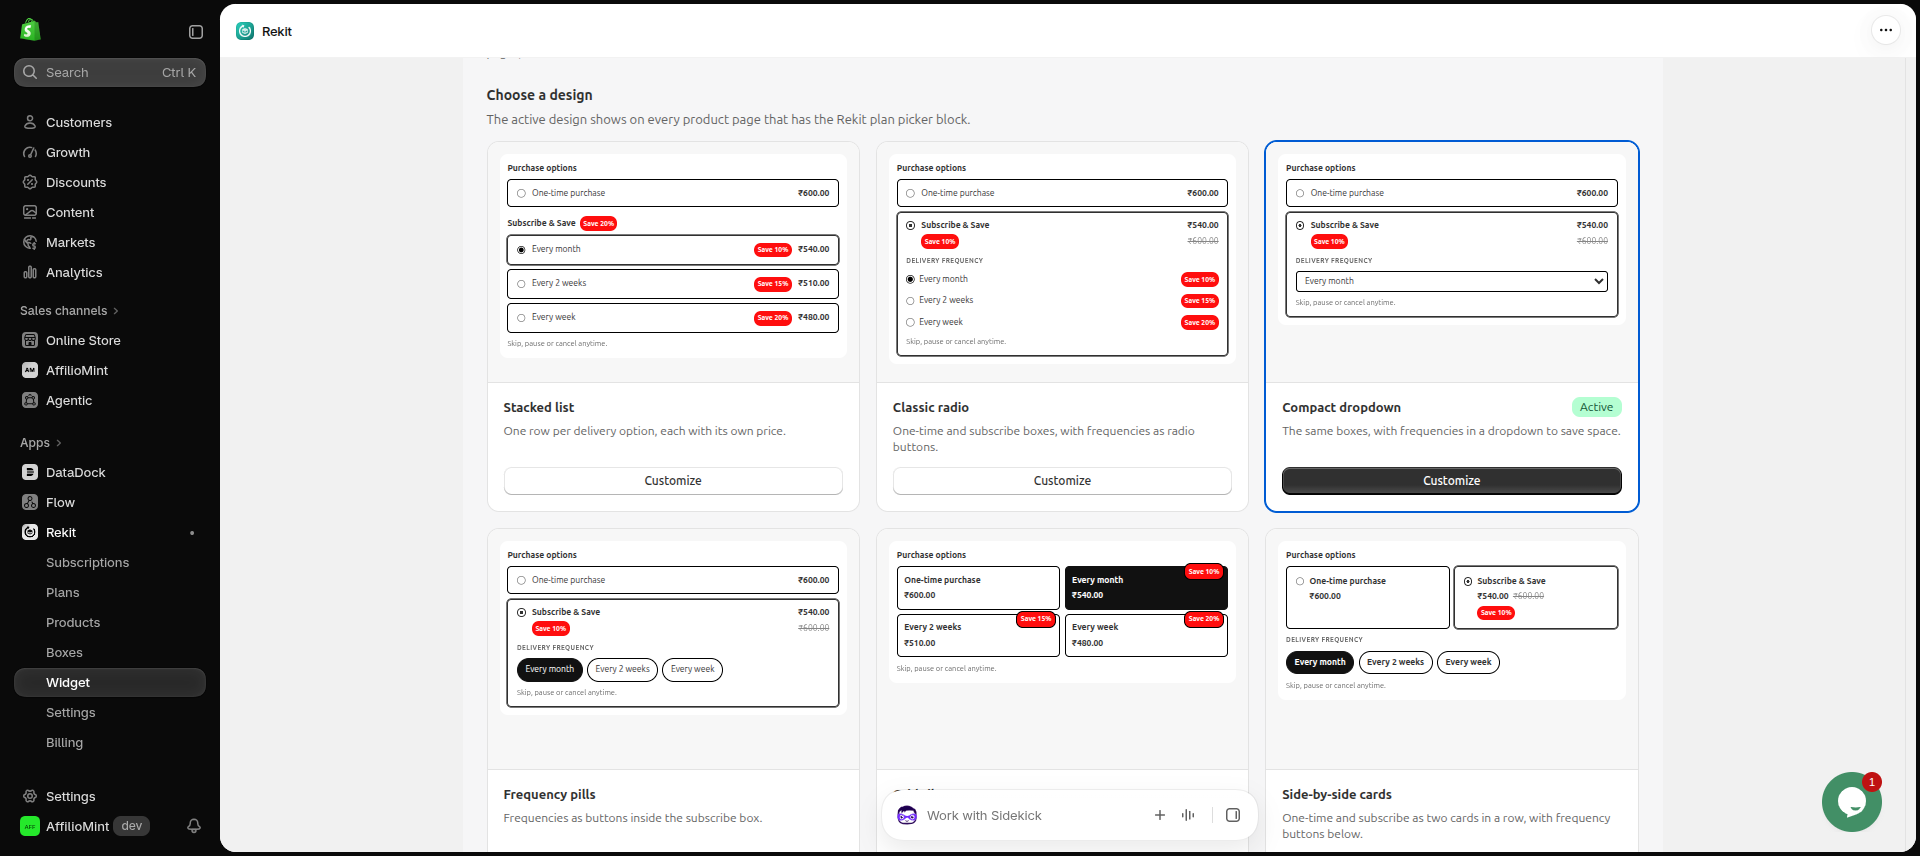
To change how the options look, open Widget in Rekit and choose a design.
The Rekit portal link block adds a "Manage your subscriptions" link for signed-in customers. See Customer portal below.
Step 4 of 6
Customer portal
The customer portal is where subscribers manage their own subscriptions. It lives on your store domain, so add it to your header menu and customers can find it from any page.
1. Turn on the portal
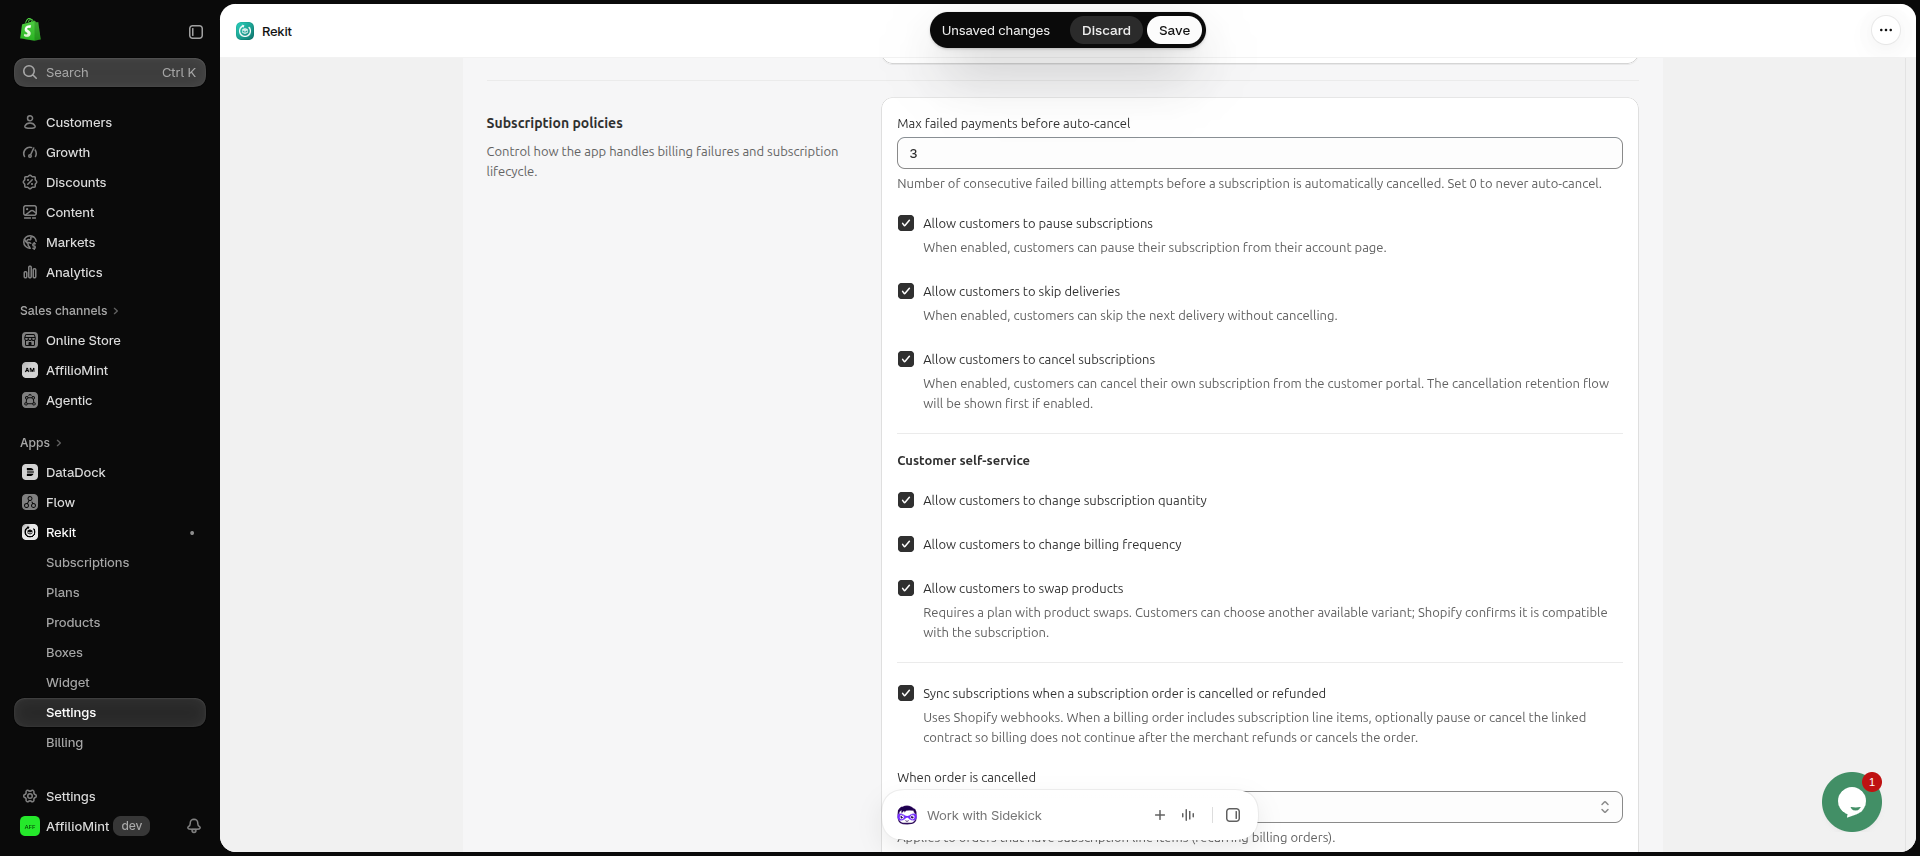
- In Shopify admin, open Apps → Rekit → Settings.
- In the Customer portal card, make sure Enable customer portal is on.
- Optional: in the Subscription policies card, turn on Allow customers to cancel subscriptions if subscribers may cancel without contacting you.
- Click Copy link next to Your portal URL, then save.
2. Add it to your header menu
- In Shopify admin, go to Content → Menus (on older admins: Online Store → Navigation).
- Open the menu your header uses, usually Main menu.
- Click Add menu item.
- Enter a label, for example Manage subscriptions.
- In Link, paste the portal URL you copied, or type
/apps/rekit/portal. - Click Save on the menu item, then Save menu.
3. Test it
- Open your storefront and click Manage subscriptions in the header.
- Signed out, you see Log in to manage subscriptions with a Log in button.
- Sign in as a customer with a subscription, and the portal lists their subscriptions.
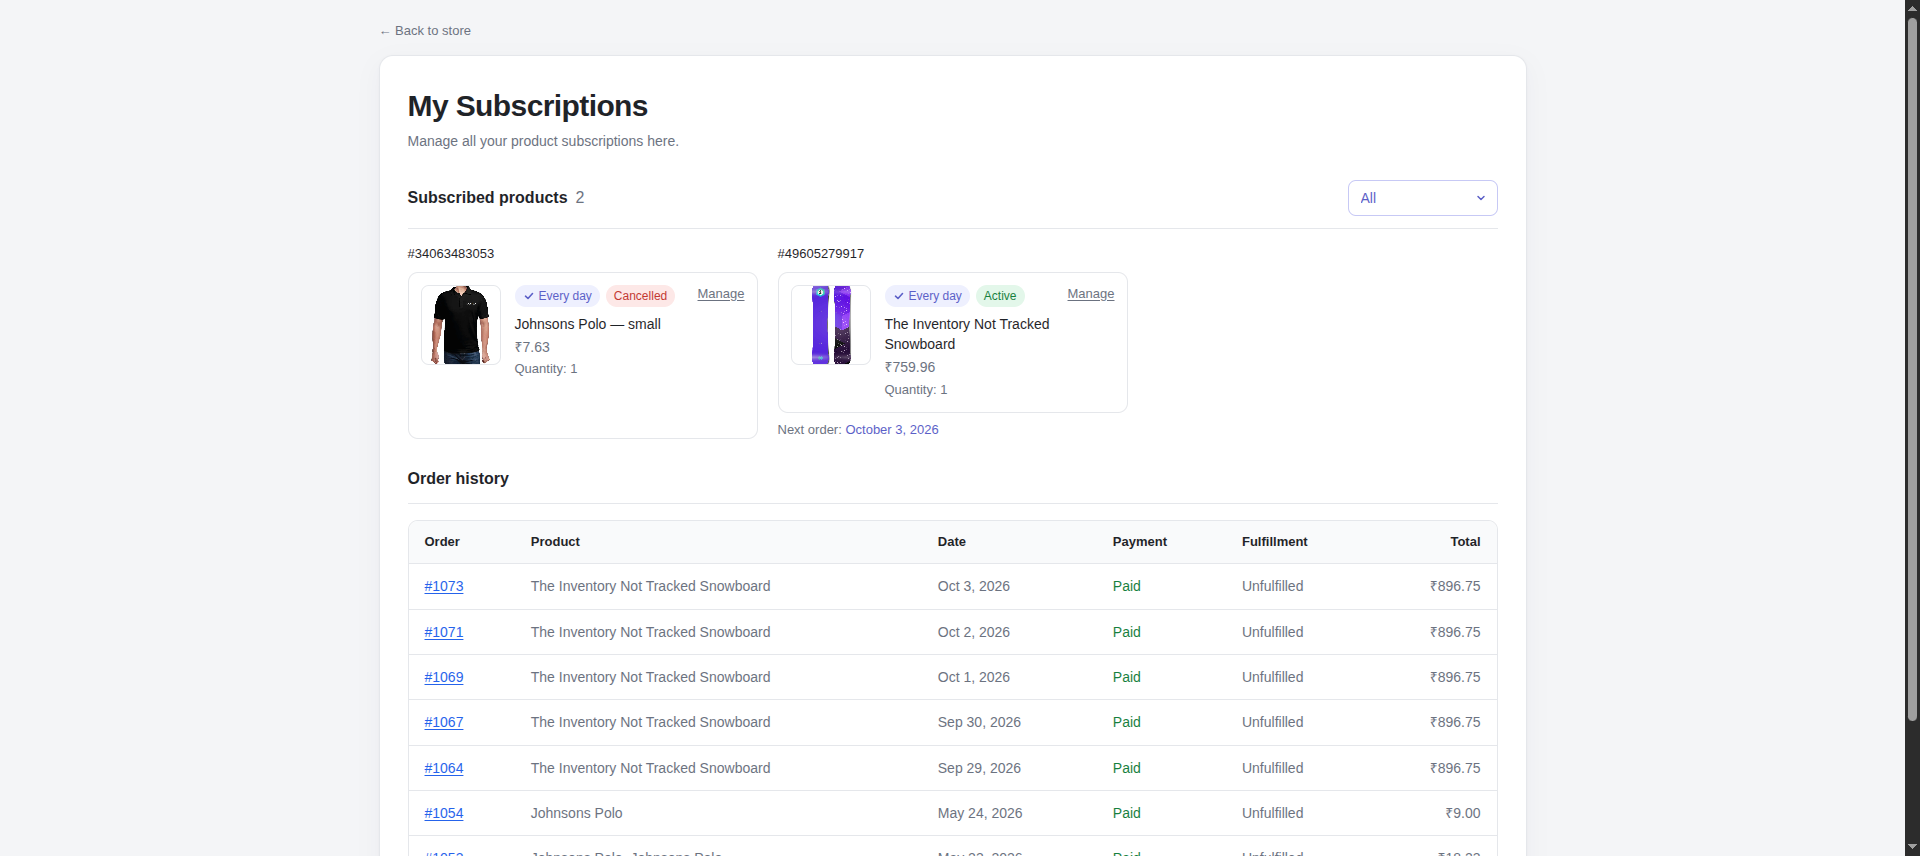
What customers can do in the portal
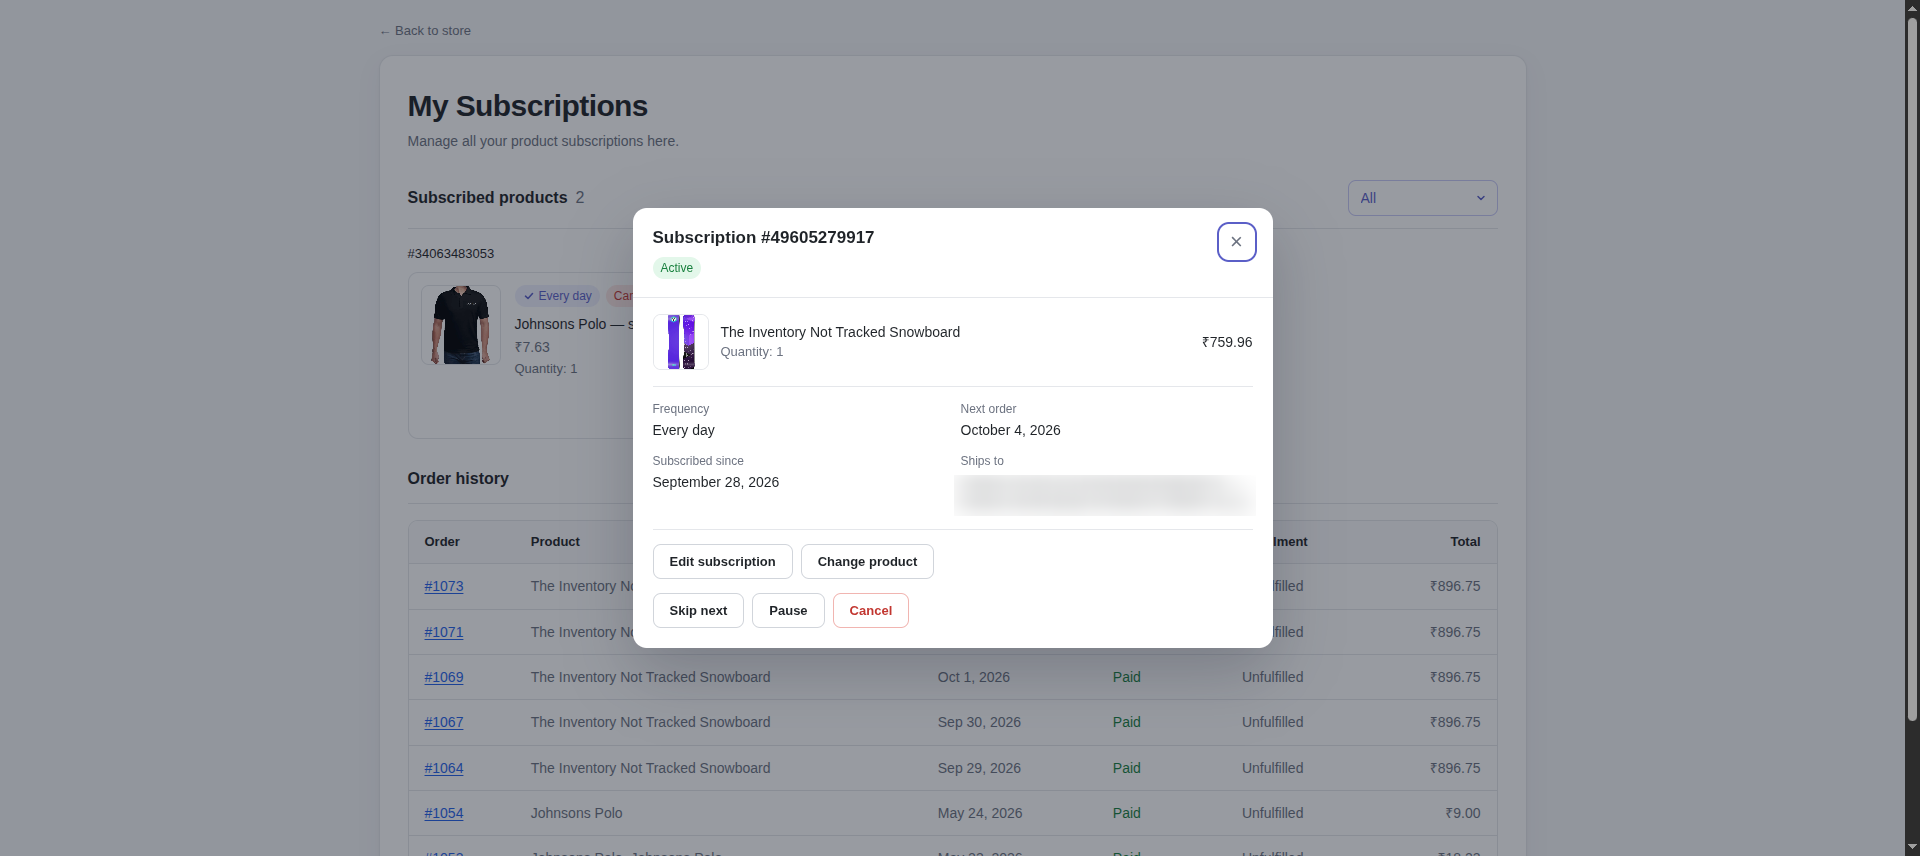
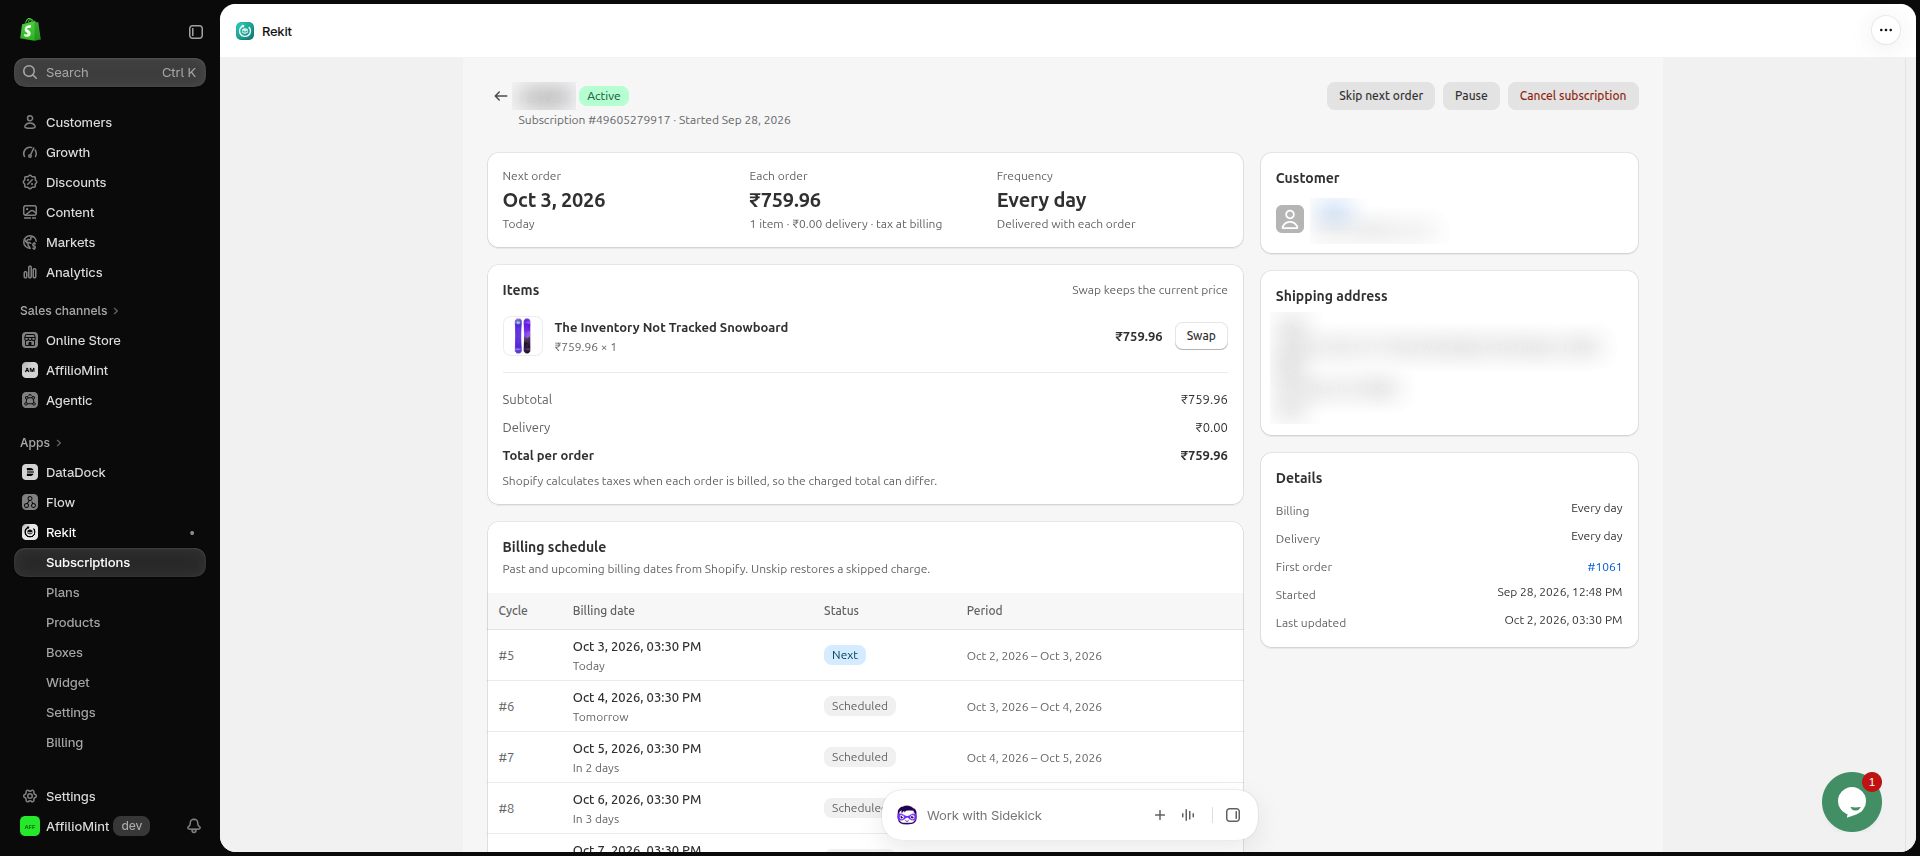
- Skip their next order, or undo a skip.
- Pause and resume a subscription.
- Edit subscription: change quantity and how often it's billed.
- Change product: swap to another product or variant.
- Cancel, if you allow it in Settings. Customers are offered skip or pause first.
On new customer accounts, you can also add the Rekit Subscriptions page to the account menu in Settings → Customer accounts → Customize.
Step 5 of 6
Day-to-day in the app
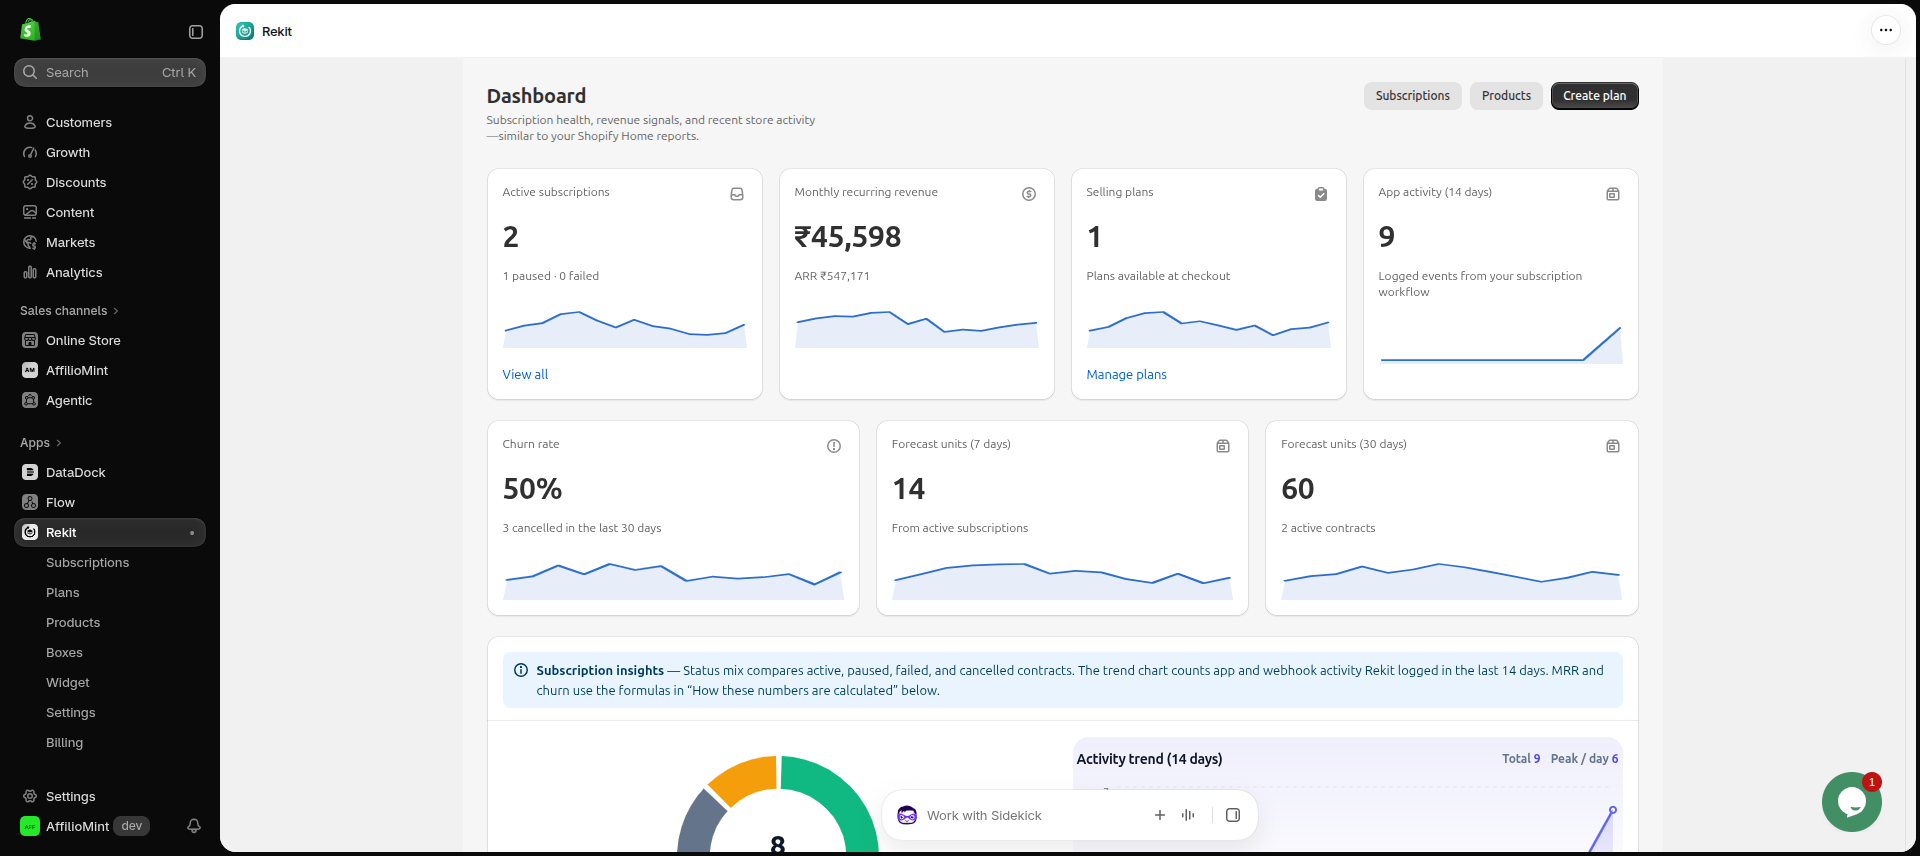
- Dashboard: subscribers, revenue and recent activity at a glance.
- Plans and Products: change your plans and which products they're on.
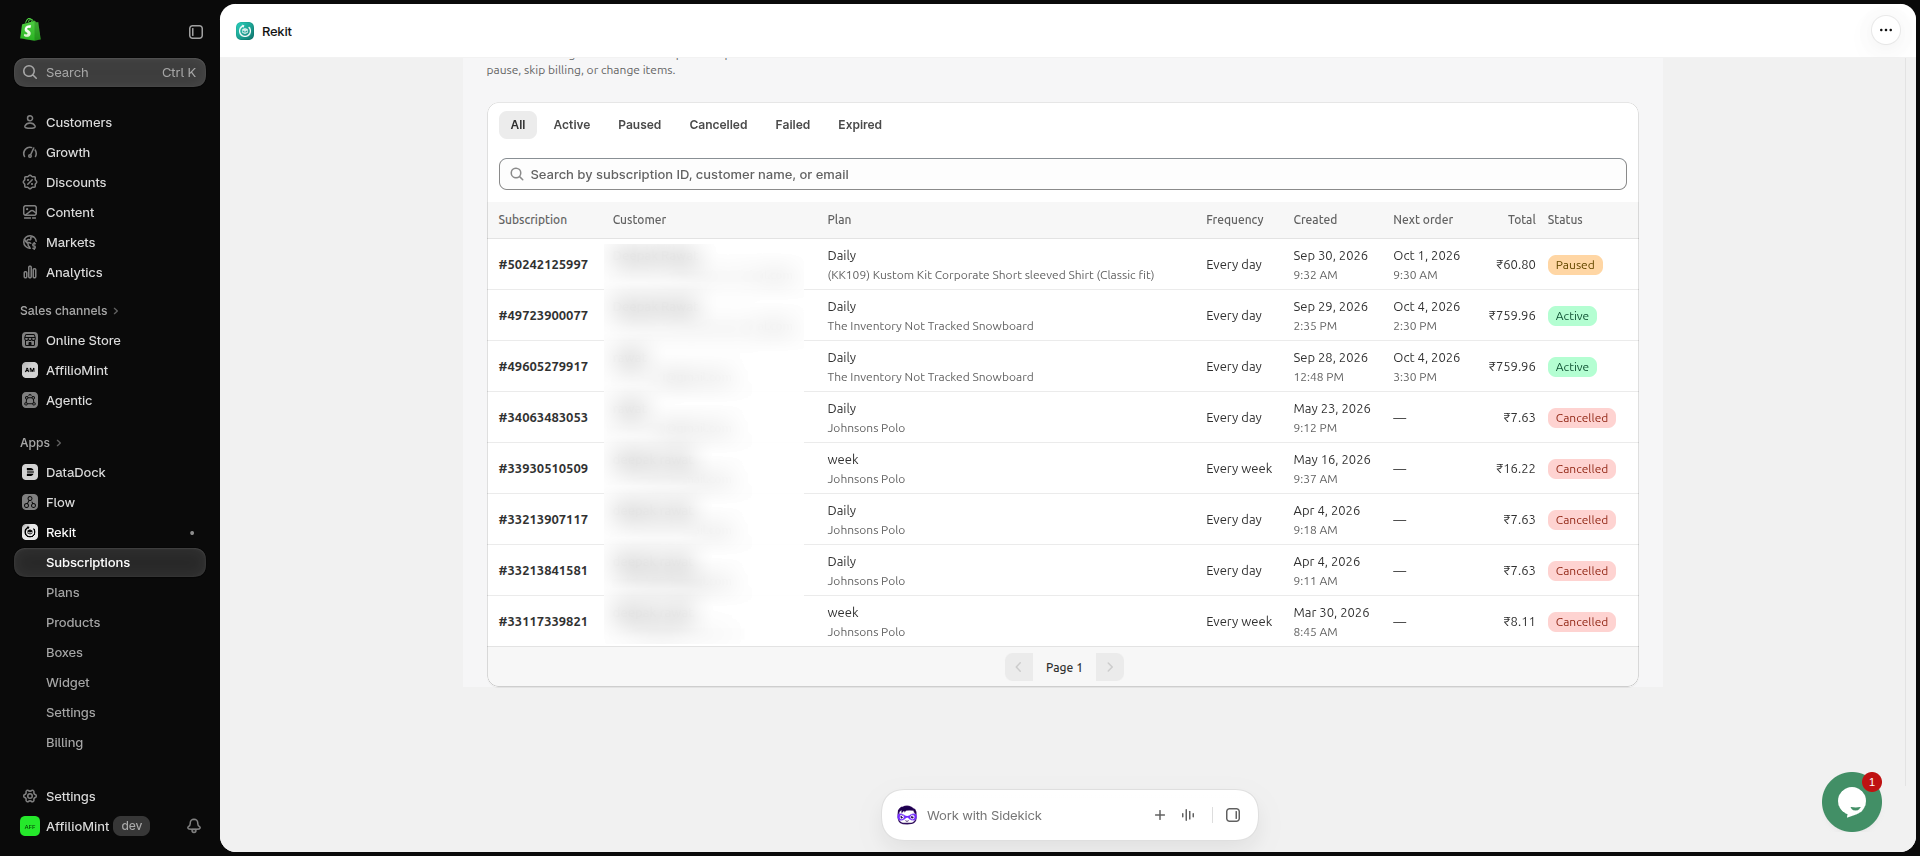
- Subscriptions: see every subscription and open one to manage it for your customer.
- Settings: customer portal, cancellation and billing rules.
- Billing: your Rekit plan.
Step 6 of 6
Troubleshooting
- Subscription options don't show on a product: Check the product has a plan (step 2) and the Rekit plan picker block is on your product template (step 3).
- Customer portal says "page not found": Make sure Rekit is still installed. If it says the portal is off, turn on Enable customer portal in Rekit → Settings.
- Something else isn't working: Contact us through our Shopify App Store listing.
You're all set
Your store is ready to sell subscriptions. See everything else Rekit can do to grow your repeat revenue.